Most IKEA KALLAX units are beginner-friendly, but larger sizes take longer because every cube needs to stay square and aligned. A 2×2 takes about 30–45 minutes. A 4×4 can take 2–3 hours. The back panel installation is the step that trips most people up.
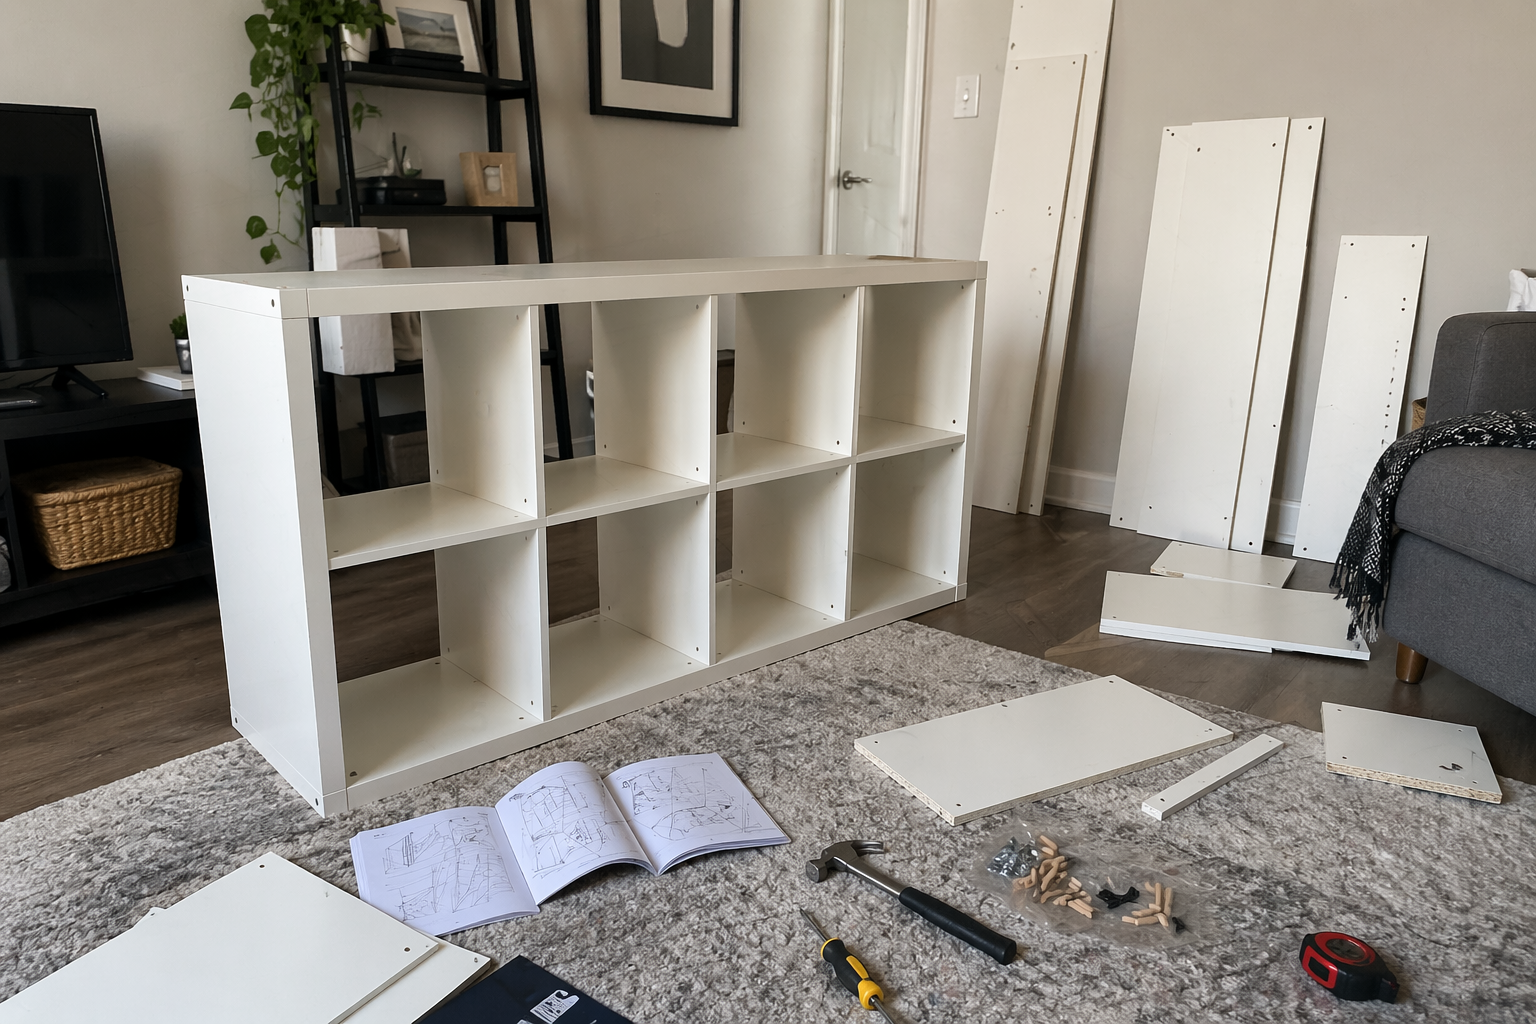
A real KALLAX 2×4 build in progress. Most buyers reach this stage in about 30 minutes — the back panel and standing it upright is where the time adds up.Rather skip the build? Book a Tasker →
45–60m
2x2 unit
1.5–2h
4x4 unit
Moderate
difficulty
Assembly time by KALLAX size
Size
Cubes
Avg Time
1×2
2 cubes
30–45 min
2×2
4 cubes
45–60 min
1×4
4 cubes
45–60 min
2×4
8 cubes
1–1.5 hours
4×4
16 cubes
1.5–2.5 hours
What adds time to a KALLAX build
Insert boxes and doors
Each KALLAX insert (drawer, door, or box) adds 10–15 minutes. A fully loaded 4×4 with inserts can take 3+ hours total.
Larger sizes are disproportionately harder
The 4×4 is not just twice as hard as the 2×2 — the large panels are heavy and harder to maneuver alone.
Wall mounting
KALLAX units used as room dividers or tall shelves must be wall-anchored. This adds 20–30 minutes.
FlatPackTime earns a small commission on purchases — at no extra cost to you.
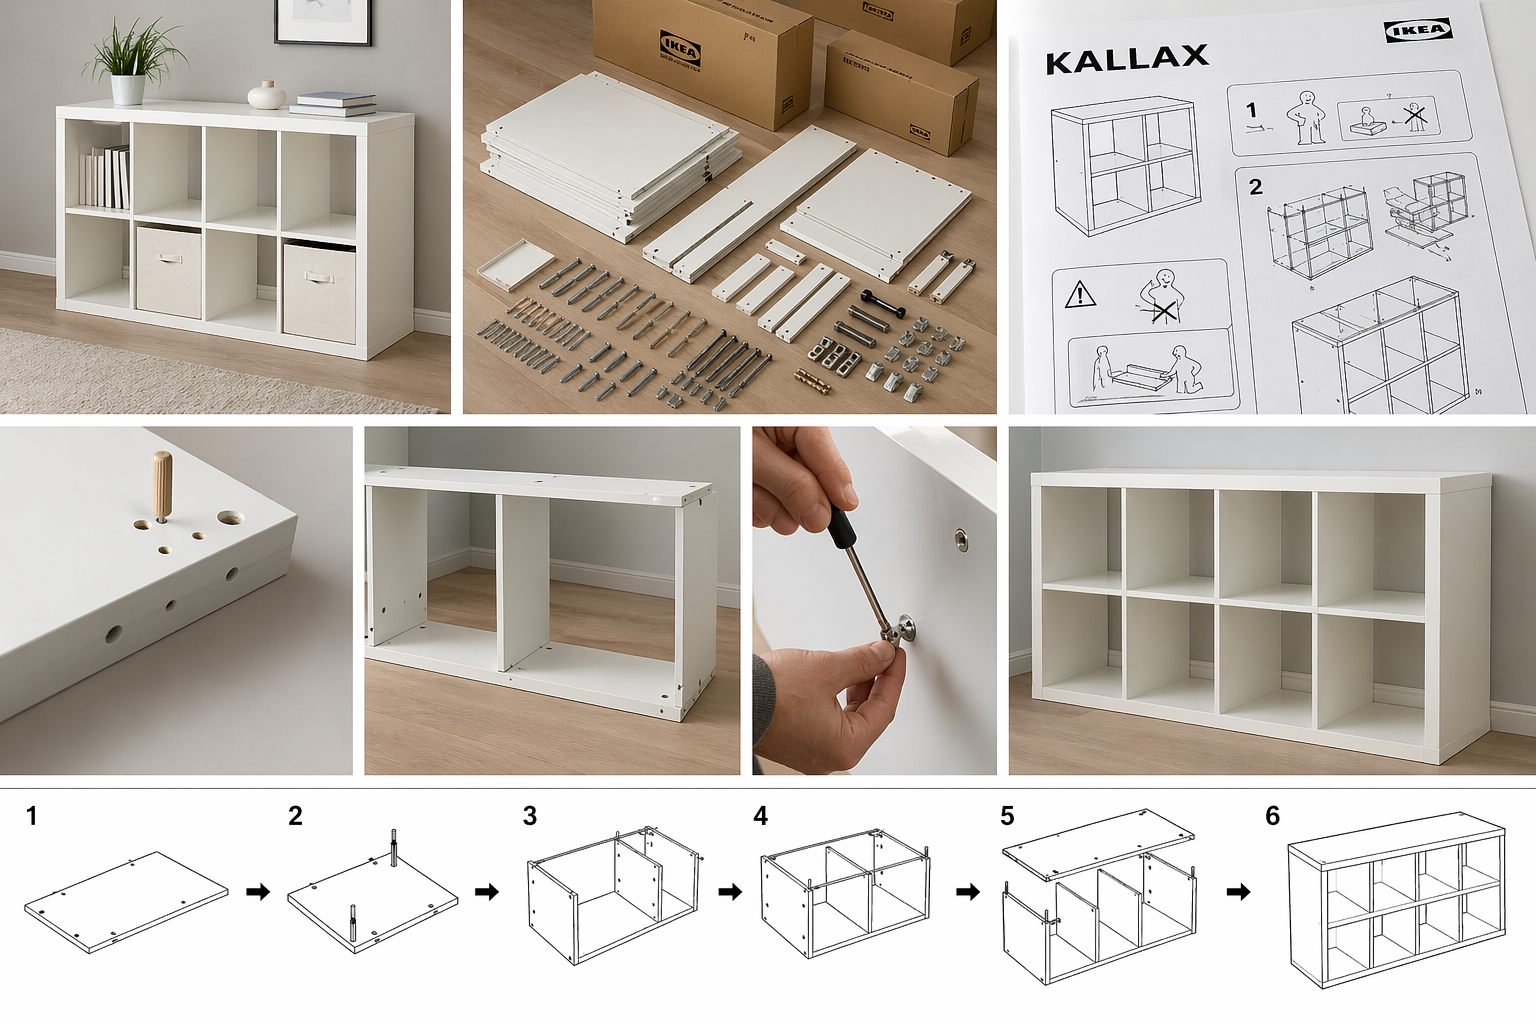
KALLAX assembly from start to finish — parts layout, instructions, and the build sequence. Follow the steps in order; skipping ahead is the most common cause of a misaligned frame.
Tips for assembling KALLAX faster
Build flat on the floor
Assemble the entire unit lying on its back, then tip it upright. Much easier than trying to build it standing.
Check squareness as you add each shelf
Insert internal shelves one at a time and check the frame is square before moving to the next. Fixing a racked frame after all the shelves are in is much harder than catching it early.
Insert dividers before side panels
Slide all internal dividers into one side panel before attaching the other. They're almost impossible to add after.
Make sure the back panel is fully flush
The back panel — open or thin panel — should sit flush in the groove on all four sides. Any gap means something is misaligned in the frame.
Add inserts after the unit is standing
Door inserts and drawer boxes are much easier to install once the unit is upright and in position.
Use a second person for 4×4
The large panels are heavy and awkward. Solo is fine for 2×2, but get help for the big units.
Look up your exact KALLAX model
Check real assembly times for your specific size and configuration: